1. Introduction
The “Start/Stop Bug” is a software issue affecting the controller’s operation. When the “Start” button is pressed within the SPEED menu, instead of switching to “Stop” as expected, it immediately returns to the “Waiting for Start” state. Despite this, the motor begins to move, making it appear as if the button press was not registered properly. Additionally, other layouts such as the DISTANCE menu may not function correctly or respond inconsistently, affecting motor control and potentially creating safety concerns or operational confusion.
This instruction manual will guide you through a simple process to resolve this issue by rolling back to a previous firmware version and then updating to the latest fixed version.
2. Requirements
To resolve the “Start/Stop Bug,” please ensure you have the following items:
- USB Type-C Cable: For connecting the controller to your PC.
- Windows 10 or Windows 11 PC: The application required for the firmware update is compatible with these operating systems.
- Firmware Files & Application: Links to download the firmware files and the application will be provided later in this instruction manual.
Step 1: Install the Windows Application
1. Download and Extract the Archive
- Download the provided archive DOWNLOAD
- Right-click the archive and select “Extract All…” to unpack the contents.
- Make sure you note the folder where you extract the files, as you’ll need to access this location for the installation process.
2. Locate the Installation Folder
- Within this folder, you will find the necessary installation files, including:
- UPAN_1.18 (folder containing relevant application files)
- Ember_v2_CNCHouse_UPAN_IntFlash_v1.BIN (firmware file)
3. Running the PowerShell Script for Installation
Navigate to the
UPAN_1.18folder.Locate the file named
Install.ps1.Right-click on
Install.ps1and choose “Run with PowerShell.” This script will guide you through the installation process of the application.Note: If prompted with a security warning, confirm that you wish to run the script.
Follow the on-screen instructions to complete the installation.
4. Manual Installation (if required)
- If the PowerShell script does not execute correctly, or if an error occurs:
- Open the extracted folder again.
- Find the
.msixfile within the UPAN_1.18 folder. - Double-click the
.msixfile and follow the prompts to manually install the application.
Step 2: Restart the Controller in Bootloader Mode
To proceed with the firmware update, the controller must be restarted in bootloader mode. Follow the steps below to do so:
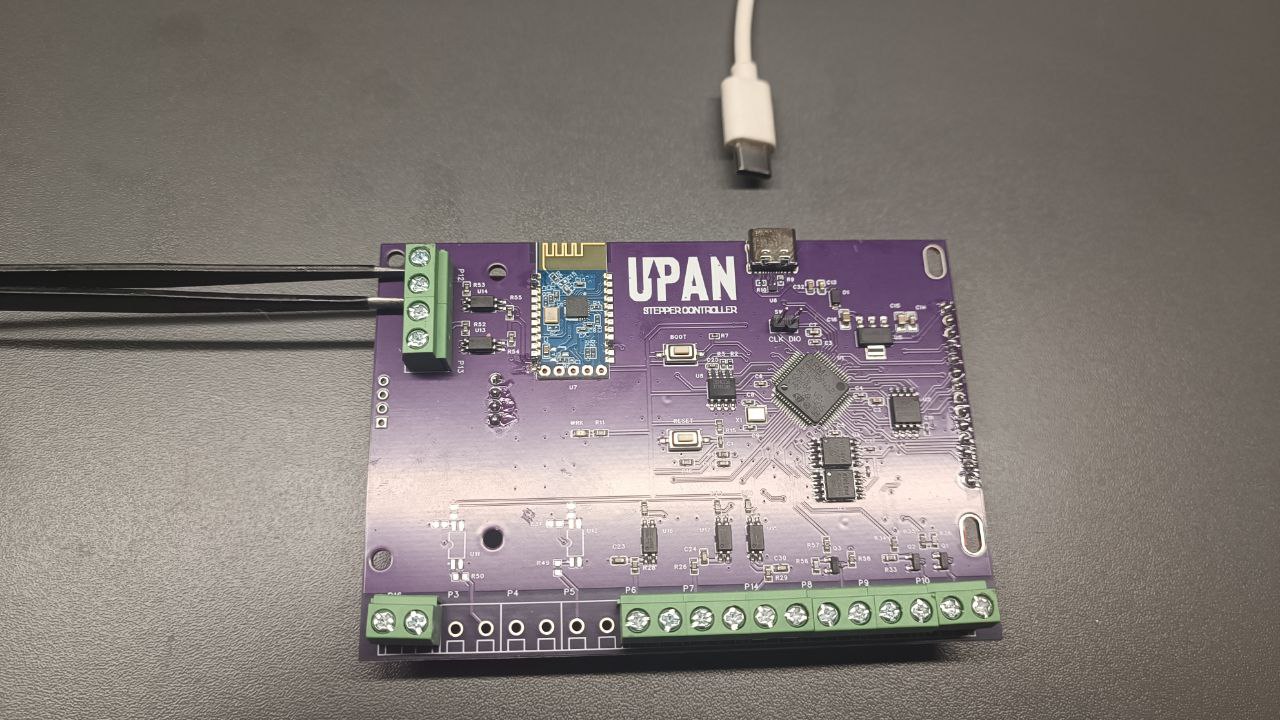
1. Short the P13.1 and P13.2 Inputs
- Locate the P13.1 and P13.2 inputs on your controller. These are the inputs typically used for the Start/Stop command when a physical button is connected to the controller.
- Short these inputs by either:
- Using a small piece of wire as a jumper.
- Carefully using tweezers to connect the two inputs (as shown in the photo below).
2. Connect the Controller to the PC
- While keeping the P13.1 and P13.2 inputs shorted, connect the controller to your PC using the USB Type-C cable.
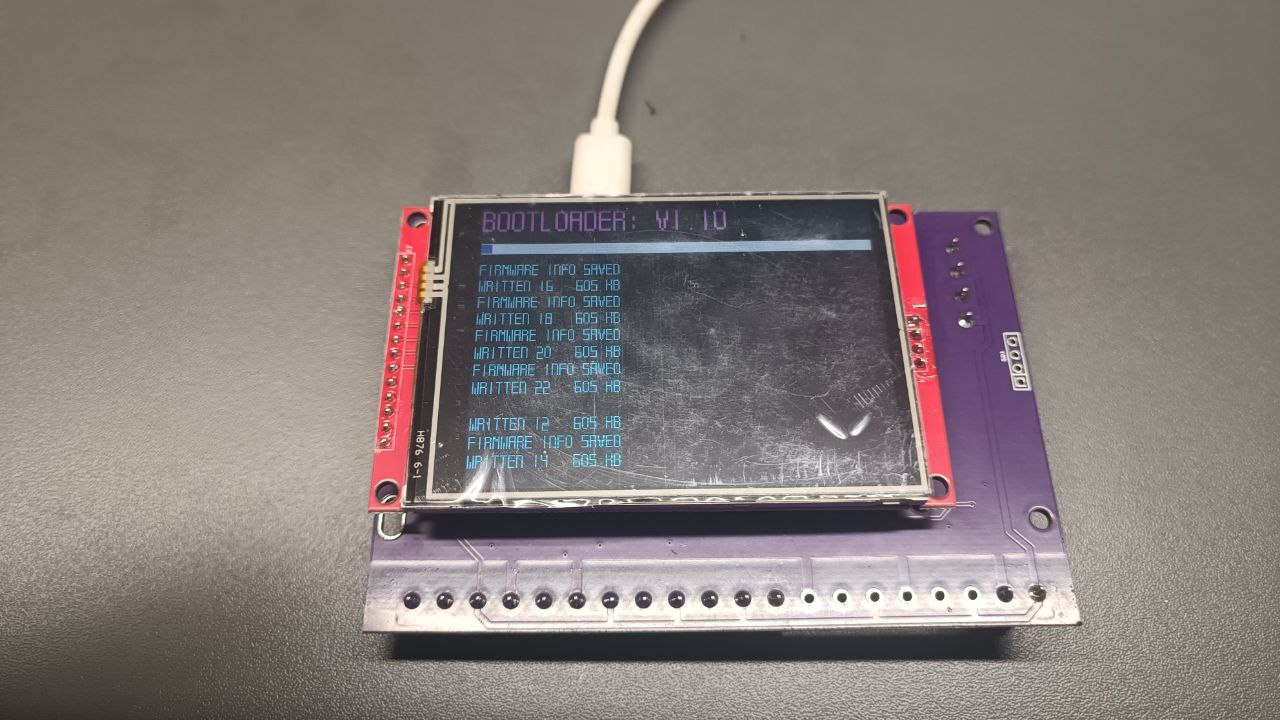
- The controller should now enter bootloader mode, and you will see the bootloader menu appear on the controller’s screen (see the image below for reference).
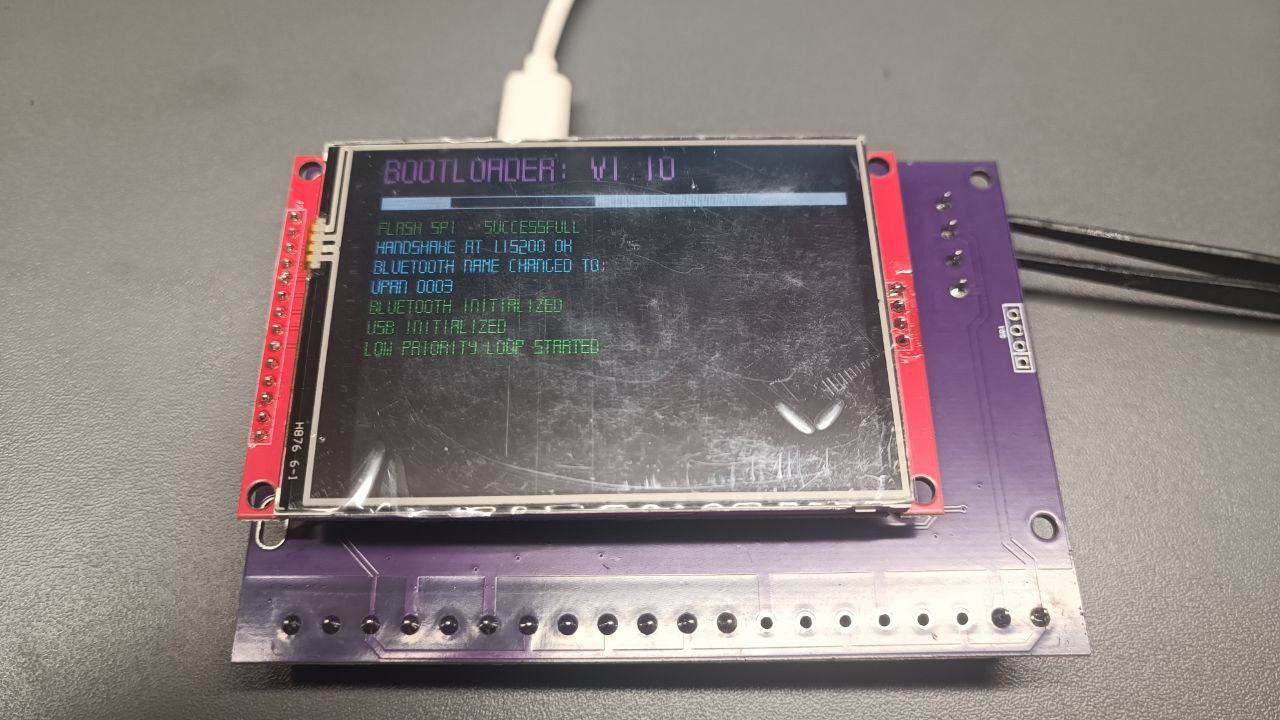
- Once the bootloader menu is visible, you no longer need to keep the P13.1 and P13.2 inputs shorted; they can be released.
Step 3: Launch the UPAN Application and Connect to the Controller
Now that the controller is in bootloader mode, it’s time to use the UPAN application you installed on your PC.
1. Open the UPAN Application
Option 1: Using the Start Menu
- Click the Start button on your Windows PC.
- Look for the installed application named UPAN under All Programs or type “UPAN” in the search bar.
- Click to launch the application.
Option 2: Directly from the Installation Folder
- Alternatively, you can navigate to the folder where the UPAN application was installed (refer back to Step 1 if necessary).
- Double-click the executable file to run it.
2. Automatic Device Detection
- Once the UPAN application starts, it will automatically search for connected devices.
- If all previous steps were completed correctly, the application will detect the controller on one of the available ports and connect to it automatically.
- The connection status and detected port information will be displayed on the screen (as shown below).
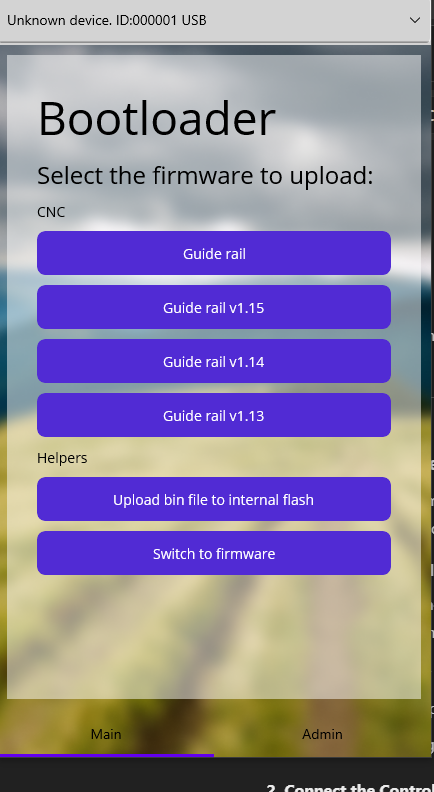
3. Access the Firmware Selection Menu
- After the device is successfully detected and connected, you will be directed to the Firmware Selection Menu.
- This menu allows you to choose the appropriate firmware version for your controller.
Note: If the application does not automatically detect the controller, double-check the USB connection and make sure the controller is still in bootloader mode.
Step 4: Load the Firmware Version 1.13
To resolve the “Start/Stop Bug,” you need to load the firmware version Guide rail V 1.13 onto your controller. Follow these steps:
1. Select the Firmware
- In the UPAN application, from the Firmware Selection Menu, click on “Guide rail V 1.13.”
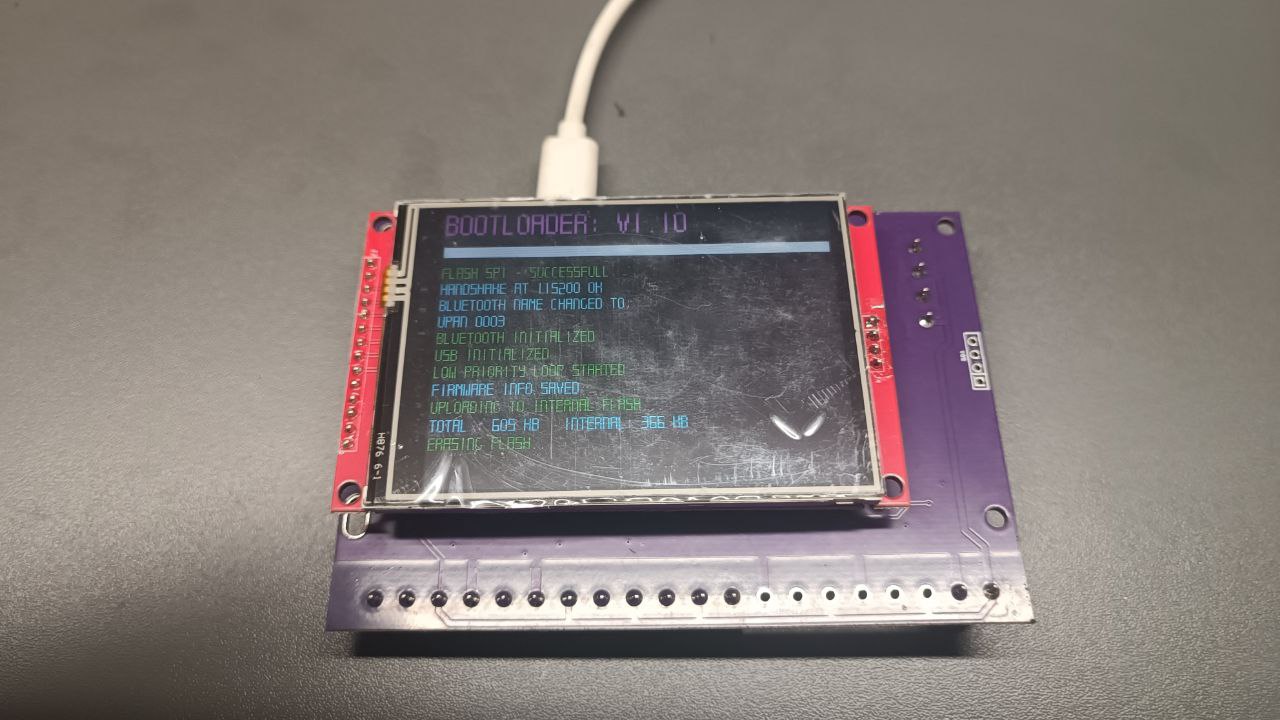
2. Monitor the Firmware Update Process
Once the firmware update begins, you will see a progress bar on both the controller’s screen and in the UPAN application, showing the data transfer.
Allow the process to complete without interruptions.
3. Complete the Update
Once the firmware upload is finished, go back to the UPAN application on your PC.
Click on the button “Switch to firmware” to finalize the installation.
The controller should now restart, and the screen will confirm that firmware version 1.13 is installed.
4. Verify the Update
- To verify that the bug has been resolved, navigate to the SPEED layout on your controller.
- Press the Start button and ensure it operates correctly.
Step 5: Restart the Controller into Bootloader Mode Again
Now that the firmware version 1.13 has been successfully installed and verified, the next step is to reload the controller into bootloader mode to proceed with the final firmware update.
1. Enter Bootloader Mode
- Short the P13.1 and P13.2 inputs again as described in Step 2 (either using a jumper wire or tweezers).
- While holding these inputs shorted, connect the controller to the PC using the USB Type-C cable.
- The controller will re-enter bootloader mode, and the bootloader menu will appear on the screen.
2. Keep the UPAN Application Open
- Do not close the UPAN application; it should still be open on your PC.
- The application will likely recognize the controller with the same USB port number as before.
3. If the Application Does Not Detect the Controller
- In case the UPAN application fails to detect the controller:
- Close the application.
- Reopen UPAN so it can automatically search for and find the controller once more.
Step 6: Upload the Final Firmware Version 1.19
To complete the update process, you will now load the final firmware version onto your controller using the UPAN application. Follow the instructions below.
1. Select “Upload bin file to internal flash”
- In the UPAN application, click on “Upload bin file to internal flash”.
- A standard file selection window will appear on your PC.
2. Choose the Correct Firmware File
- Navigate to the extracted archive and locate the firmware file:
Ember_v2_CNCHouse_UPAN_IntFlash_v1_19.bin - Select this file and confirm your choice.
3. Firmware Upload Process
- Once you select the
.binfile, the firmware upload will automatically begin. - This time, there will be no progress bar shown in the UPAN application, but the process may take a few minutes.
4. Monitor the Controller’s Screen
- On the controller’s display, you will see messages and progress information indicating that the firmware is being uploaded.
- When the screen stops displaying information about the upload process, it means the firmware upload is complete.
5. Switch to the New Firmware
- In the UPAN application on your PC, click on the “Switch to firmware” button.
- The controller will reboot, and it should now be running firmware version 1.19, which is the latest version.
6. Disconnect and Begin Using the Controller
- You can now safely disconnect the controller from your PC.
- Your controller is fully updated and ready to use!
Need Assistance?
If you have any questions or encounter any issues during any step of the process, please do not hesitate to reach out to me for help. You can contact me at [email protected].
Please note, there were only 10 controllers shipped with this specific firmware, so consider yourself one of the lucky few!
I apologize once again for any inconvenience caused and appreciate your understanding and patience as we work to resolve this issue.